PX4 G-SD and Compact Carry Add-On
Add On Components for your PX4 G-SD or PX4 Compact Carry
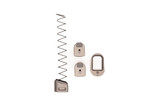
The Springer Precision Magwell Kit includes the magwell for your Full Size (G-SD or legacy Full Size PX4) or Compact (Compact Carry or ANY Compact 9mm PX4) as well as two base pads and one extension pad with replacement mag spring.
The -A model X300 MUST be used with the Surefire Rail-Lock Kit (included with every Surefire X300-A), installation instructions can be found here: Redirecting to Big Tex Ordinance
The VP Armory Compensator connects to your 9mm PX4 Full Size or Compact via the included pistol light (X300T-A for full size or TLR7sub 1913S for Compact)
THE COMPENSATOR ATTACHES VIA THE WML; WE CANNOT INSTALL THE COMPENSATOR ON YOUR GUN WITHOUT THE LIGHT.
Upgrading your handgun with a compensator requires a higher level of maintenance and care. Ensuring that it is installed correctly and checked frequently is critical for proper function and safety.
It is possible to experience a failure with the Vantage Point Armory PX4 compact compensator that results from a broken or loose center tensioning or attachment screw. If the attachment screws become loose during firing, or breaks due to improper installation, it will cause the light body to droop downward, dropping the recoil lug out of engagement with the rail.
If this is not identified by the user, the compensator will slide forward with each shot, until it travels far enough down the rail and is able to bend downwards into the line of the bore. If this happens, you will get a baffle strike on the compensator.
THESE FAILURES ARE PREVENTABLE and AVOIDABLE.
Carefully read and follow the instructions below to avoid damaging your compensator and firearm.
-
All screws must be de-greased prior to installation. We recommend the use of isopropyl alcohol or alcohol wipes.
-
All screws must have a medium-strength, medium-to-high temperature threadlocker applied in accordance with their manufacturer's instructions. We recommend a small application of Green Loctite 290 on each screw. Blue Loctite 246, 242, or 248, are also acceptable if you intend to remove the compensator more regularly, but these products are more likely to loosen under an aggressive firing schedule.
-
Install both hex-head screws. Torque to 10-12 in/lbs.
-
Install the center slotted screw with its spring. (do not over tighten)
-
Witness mark all three screws with an oil based paint pen.
-
The first time the firearm is fired with the compensator installed, the screws should be checked after the first few shots to insure it has been installed properly.
-
Regularly check your witness marks to ensure that the screws have not loosened. If they loosen during firing, re-torque them immediately.
-
If any of the attachment screws become damaged or loose, do not attempt to fire the handgun with the compensator attached. You will need to replace the screw.
Failure to follow these instructions may result in injury to the shooter and damage to the
compensator and firearm. As the Customer, you acknowledge and agree that it is solely your responsibility for complying with these procedures and checking your compensator regularly. We are not responsible for damage to the compensator or firearm. Please reference our Corporate Disclaimer for further explanation.


